


Docker for Data Science: Building Web Apps

Building a web application and getting it to run in Docker. If you're a data scientist or Data Engineer then you may not see the merit in completing this exercise. I implore you to follow along. In the last blog we ran hello-world, this is good at validating that our Docker environment is working, but it is hardly a proper hello-world. Creating a simple web application will demonstrate all key commands and constructs.
This is quite a long blog. The way I learn best is to take some code and run it, build my own version of what someone else has done. That way I really understand what happened. Doing that from a blog is quite difficult, to try to help, I have recorded a video going though each of the steps.
In this blog we will do the following:
Look more at the process of building an image
Create a DockerFile which will describe how to run our web application
Create all the application code to run our web application
Look a bit at Flask for Python.
Build an image
Run the container
Stop our container & delete the image
The key components of a docker container.
We discussed in the first blog, Docker fundamentals, that an image is made up of a small number of artefacts.
DockerFile
Application Code
Files and dependencies
Base Image

By the end of this blog we will have created all of these.
Exploring the DockerFile
When I started working with Docker this was one of the elements I did not really understand. The DockerFile is what tells Docker how to build your image. It is a metadata file which tells the Docker Daemon which files to grab from your local machine and move to the image file, it tells Docker what ports to run on, any additional dependencies to install and most importantly the entry point for your application.
# our base image
FROM alpine:3.5

# Install python and pip
RUN apk add --update py2-pip

# install Python modules needed by the Python app
COPY requirements.txt /usr/src/app/
RUN pip install --no-cache-dir -r /usr/src/app/requirements.txt

# copy files required for the app to run
COPY app.py /usr/src/app/
COPY templates/index.html /usr/src/app/templates/

# tell the port number the container should expose
EXPOSE 5000 # run the application CMD ["python", "/usr/src/app/app.py"]
Lets take a look at an example from the Docker website.
# our base image FROM alpine:3.5This is a sample from the Docker documentation. Starting at the top let's dissect what is happening.
FROM alpine:3.5The Docker file is using the keyword FROM. This is telling the Docker engine which image should be used to inherit from. All docker images inherit from another image. In this case, the container is inheriting from Alpine, a Linux distribution (one that is quite lightweight and works well for containers). This image does not appear to have Python installed by default. So the DockerFile will add that first.
RUN apk add --update py2-pipThis step is using the Run keyword. Run tells the image to run a particular command in the terminal - apk add will install packages. This has Installed Python and PIP. PIP is used for installing dependant packages in Python.
COPY requirements.txt /usr/src/app/RUN pip install --no-cache-dir -r /usr/src/app/requirements.txtThis step is using the COPY keyword. This can be sued to copy over a file or files from your machine to the container. We will be using this a lot later when we look at serialisation of models. This step is coping a file called requirements.txt. This is a very common pattern for handling dependencies in Docker and Python. The next step is similar to what we saw before, however rather than using apk, it is using PIP to install all the packages the code will need from requirements.txt.
COPY app.py /usr/src/app/COPY templates/index.html /usr/src/app/templates/This will copy the code file app.py to the /usr/src/app/ folder and then copy the contents of the templates folder to a new folder called templates. This is just preparing the Linux container with all the code and dependencies required to ship the application. After this step we are ready to set the container running.
EXPOSE 5000This is using the keyword EXPOSE. What EXPOSE does is tell the docker engine what port to forward. If an application is servicing a REST API on a particular port then this will need to be exposed otherwise the container will default to using post 80.
CMD ["python", "/usr/src/app/app.py"]Finally we see the part of the DockerFile which is actually running the application. This is telling the Docker engine to open a terminal and run python and then the location of the file to run.
And with that, you have described all the steps for creating an image of your application. It is ready to be deployed.
Docker images
We have seen that the DockerFile tells the Docker daemon how to run the application as a container. The container as we learnt earlier has no operating system, it inherits all it needs from a base image. In our example about, that base image with Alpine 3.5 which then had Python installed. There are Python images available which the author could have inherited from. If there is an image which does everything you want this then that is a good place to start. In production I recommend building the smallest possible image. There is more on this further in the blog.
Finding images to inherit from.
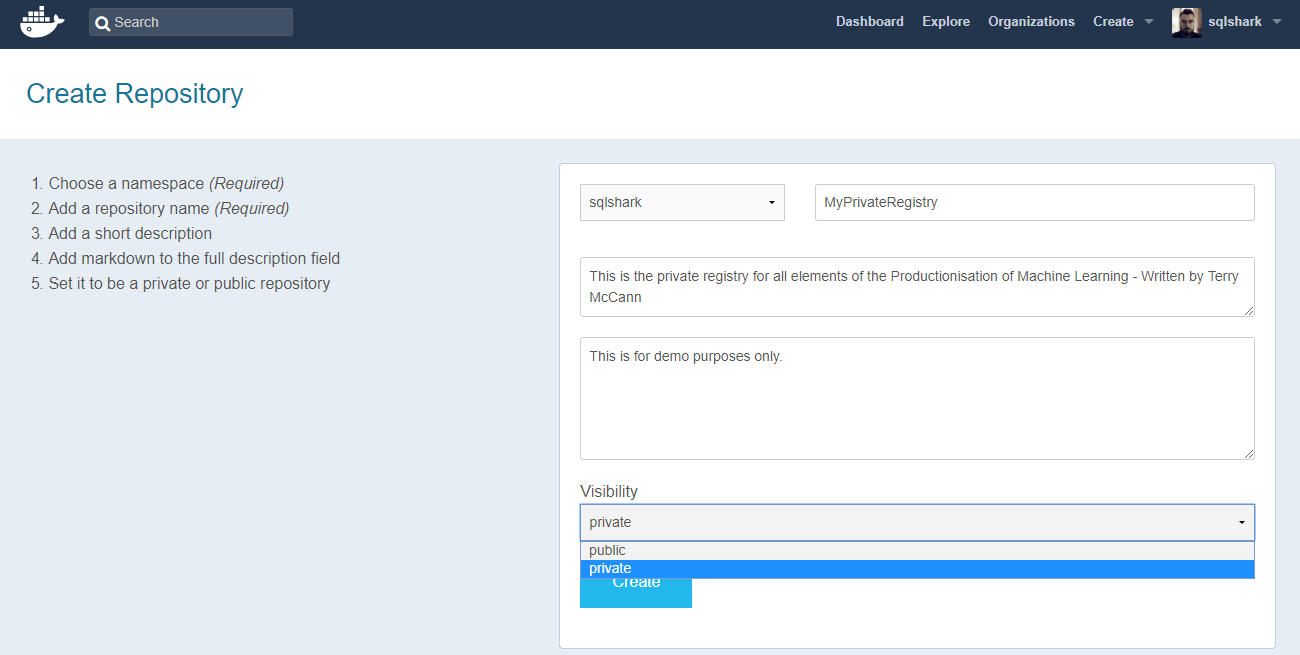
Where do we go to get new images? All images are held in a container registry. This is an area where images are deployed for the world to use. There are public and private registries and there many options available. The main source of images it held at docker hub - https://hub.docker.com/ Here you will find official images for almost all scenarios.

If you go to hub.docker.com and click on explore, you will see a list of categories each containing many images. In the figure above you will see nginx a popular web server, alpine the operating system, busybox, redis and mongodb. Under each of these categories will be the reference to multiple different images. If you click on Alpine you will see a list of all the images available to use.

Why do we need so many variants of the same image? This is all to do with guaranteeing the repeat-ability of a container. If you create a web application using alpine 3.5 and it is deployed, then 6 months later there is an issue and you need to rebuild the container. You use Alpine version 3.7, in Alpine 3.7 they have renamed a major feature you used and now your application cannot go in to production. Each version you see has different quirks and nuances. You need to understand what they are doing before using it in your project. When we come on to deploy a machine learning model as a container, handling the dependencies is crucial to ensure we can redeploy as needed. If you search on hub.docker.com for Python you will see a huge list of images you can use. We will pull from this later.
The images that you see here are all public. Anyone can download them. If you need a private registry then you can use hub.docker.com and create an account. On Docker hub you're allowed one private registry for free, then the costs increases as you need more - https://hub.docker.com/billing-plans/. Alternatives to Docker hub include Microsoft's Azure Container Registry, GitLab, TreeScale and many more. In a demo later we will create and use the Azure Container Registry.
A note about images. A lot of the images that are pre-built can be very large, the image that we will use is almost 700mb. That is a huge amount to download to run our model which is only a few lines of code! There are alternative patterns for deploying code in to Docker. A good option maybe to do the same as the previous example. Start with a small base image such as Alpine and install, python first then install the dependencies and then add our code. It means that the process of installing is a little longer, but we save huge amounts of time by avoiding the download. This become a bigger issue when we look at using Kubernetes, each time we deploy our model to a pod, it needs to download the image from a container registry, if that takes 15 minutes to complete, we could end up with our services not being available.
Deploying a web application with Docker
We will come on to how to deploy a machine learning model in a container, later in another blog We first need to see how each element plays together, based on what Docker was designed for, deploying applications.
We are going to create an application which select and display a random picture of a whale meme - This section is about Docker after all! You might be thinking well why are we doing this step and not looking at how to deploy a Machine Learning model, well because while Docker supports Machine Learning, it is not the core functionality for Docker. In this section we will build the following, a Flask web api, Python code to select an image from blob storage, a HTML template and the DockerFile to run the build.
A quick side note on working with Python. There are loads of different development environments for Python. I am running Anaconda and I use Conda for managing multiple environments on my development machine. Although we will be building a Python model in another blog, we could use R or another language. For now Anaconda has all the tools we need for Python development and the same for R. I typically use a combination of Jupyter for interactive development work and Visual Studio Code for development. As we are using Flask in this sample, I will be using VS Code.
Here is what we are looking to create:

Application step-by-step
Our application is a simple HTML front-end website with a dynamic back-end, provided by Flask.
First thing we will need to do a create a development folder for our docker image.
1. Create a folder called WhaleHelloThere. There is a clue about what we are trying to create.
The order in which we set up the rest is not really that important. We will start with a DockerFile. If you recall this is what tells Docker how to build the image.
2. Create a new python script called app.py
3. Copy the contents from below
from flask import Flask, render_template
import random

app = Flask(__name__)

# list of whale images
images = [
    "https://datascienceinproduction.blob.core.windows.net/images/Whale-Shark-Memes.png"
]

@app.route('/')
def index():
    url = random.choice(images)
    return render_template('index.html', url=url)

if __name__ == "__main__":
    app.run(host="0.0.0.0")
We are going to use two python packages, Flask and Random. Flask is what we will use for our web service. Flask is an open source project for Python which provides a micro-framework for web applications. It can be used to do a huge amount of web development tasks. You can build websites or just simple APIs. "Flask can be everything you need and nothing you don’t". We will be using Flask for exposing an API for our models, so it is good to see how this works for building a web application. We will use Flask and render_template from the flask package.
We are also using random to produce a random number to help with the random selection of an image.
Let's take a look at what the Python code is doing.
Python Application
We will start by importing all the required packages and instantiating the Flask web service. The following code will do that.
from flask import Flask, render_templateimport randomapp = Flask(__name__)We have just assigned a variable app, with the flask application. "__name__" is a special Flask variable which will return "__main__" when our application is started. We will come back to this is a moment. For now, just know that this is telling python to start our application.
images = ["https://datascienceinproduction.blob.core.windows.net/images/Whale-Shark-Memes.png"]The code above is a series of references to the images of whales. We will be selecting one of these to be returned each time you refresh your web browser. The images are all hosted in an Azure Blob Storage account. You could if you wished, replace all the links for other links.
@app.route('/')def index():url = random.choice(images)return render_template('index.html', url=url)if __name__ == "__main__":app.run(host="0.0.0.0")Now we need to add all the code to make Python select a random image and for Flask to render that image in a template and to get Flask to route that image to the user. Let's break that block down in to its component parts.
@app.route('/')When you go to a url, the landing page for that will be on '/'. www.learningmachines.co.uk/ for example. We are telling flask to execute the following commands when someone lands on the main page of our website. If someone visited www.learningmachines.co.uk/example this would fail as we have not mapped a route for Flask to understand. This is impart for our machine learning model, as we may want to have multiple routes in to our model. We may choose to have a route for scoring and for training.
def index():url = random.choice(images)return render_template('index.html', url=url)We are defining a function and calling it index. You could choose to name this anything you liked. Index is the name for the landing page, so this makes a lot of sense. We are defining a variable called url and assigning a random image. We are then passing that image off to a template file which will be rendered for the end user.
If you have not used flask before then you will need to add it to your local running version of Python.
4. Open an Anaconda prompt
5 . Run the following to install Flask
Pip install Flask==0.10.1The "==" is locking Python down to a particular version on Flask.
6. Create a folder call "templates" (lowercase t is important)
7. In the folder create a file called index.html
8. Add the following HTML
<html>
  <head>
    <style type="text/css">
      body {
        background: blue;
        color: white;
      }
      div.container {
        max-width: 500px;
        margin: 100px auto;
        border: 20px solid white;
        padding: 10px;
        text-align: center;
      }
      h4 {
        text-transform: uppercase;
      }
    </style>
  </head>
  <body>
    <div class="container">
      <h4>Whales</h4>
      <img src="{{url}}" />
      <p><small>Whale don't you just love whales!</small></p>
    </div>
  </body>
</html>
In a few lines of code we have a website which will render random images of Whales. To see what this is doing, complete the following steps:
Open a terminal/cmd window
Run the following code:
Python <location to app.py> 
You should see a screen similar to the above. Go to the URL it has provided. Like mine this will be 0.0.0.0 which is equivalent to localhost. Localhost:5000 will open a blue screen and show you a pretty picture of a Whale. Great huh! Well now we want to get that website running inside a Docker container. Before we do that, let's look at what app.py is actually doing - We will use elements of this to run our models later in this chapter.
Our render_template function will take the url and replace and where it finds '{{url}}'. The result will be a picture of a whale. With that our Python code is ready to be tested. Save what you have, or download it from GitHub.
Running this locally is great, but we want to get this code now running inside a docker container. As stated before we need two artefacts to deploy a Docker container, we need the code and a DockerFile. We have gone through a breakdown of a DockerFile already so I will not labour the point.
FROM python:3-onbuildEXPOSE 5000CMD ["python", "./app.py"]We are going to inherit from the Python:3-onbuild image. This expects a file called requirements.txt.
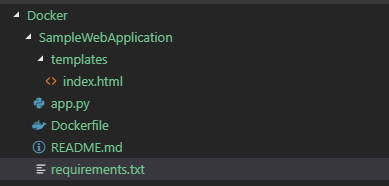
Flask==0.10.1Random==0.0.1With all of these components we can get our model built. Before you run the next lot of commands, we need to check that your file system is configured correctly. It should look like the following:
We can now get this application running on Docker and not our local machines. If you're still running the application using Python, then enter CTRL+C to kill the running session. This will conflict with the ports that docker is running on.
1. Open a new terminal
2. Navigate to the location of the Dockerfile.
cd <Location of Dockerfile>3. Run the following
docker build -t whales .Our application is now building. You should see that the base image has been pulled and PIP has installed all the packages we need
4. Now we need to run the image and see what it does.
docker run -p 5000:5000 whales That should now be running our website. You can navigate to the following to see the outcome
5. Open a web browser and navigate to the following domain
localhost:5000So what we did was run create an application and package it in a container. Then deploy it to Docker. Docker has created a port funnel on 5000 from our localhost right through. That was pretty cool.Lets stop that from running
docker stop whalesI imagine you are thinking this example is broken. He got us to do something that does not work. Well that is because an image can run multiple times. If you do not specify a name for your instance it will generate you one. If you run docker ps you can see all the images running.
docker psYou will see that the image of whales running will have been run with a generated name. In my example that name is "serene_hoover" :P
docker stop serene_hooverThat will kill that running version. To add a name we can control we will need to add another parameter.
docker run --name whalesContainer -p 5000:5000 whalesOk this is now running under a named image
docker stop whalesContainer
Summary
In this blog we did a lot. We looked at the basics of Docker, we got Docker installed, then we built an application in Python and got it running inside a Docker container. That is not bad going for our first attempt. We also discussed some best practices along the way. In the next chapter we will look more at container registries and look at how we tag our images and get a docker images pushed in to a container registry.